The plotting scripts are under the directory $SR_WX_APP_TOP_DIR/regional_workflow/ush/Python
Change to the script directory
Load the appropriate python environment for Cheyenne,
module load ncarenv
ncar_pylib /glade/p/ral/jntp/UFS_SRW_app/ncar_pylib/python_graphics
If you see something like:
Do you wish to add it to the registry (y/N)?
This will occur if this is the first time you have used the NCAR Python Library (NPL), type y, to get the following output:
Now using NPL virtual environment at path:
/glade/p/ral/jntp/UFS_SRW_app/ncar_pylib/regional_workflow
Use deactivate to remove NPL from environment
Run the python plotting script (Estimated time: 5 minutes)
Here plot_allvar.py is the plotting script, and six command line arguments are:
- 2019061500 is cycle date/time in YYYYMMDDHH format,
- 6 is the starting forecast hour
- 12 is the ending forecast hour
- 6 is the forecast hour increment
- The top level of the experiment directory is /glade/scratch/$USER/expt_dirs/test_CONUS_25km_GFSv15p2
- /glade/p/ral/jntp/UFS_SRW_app/tools/NaturalEarth is the base directory of the cartopy shapefiles
Display the output figures
The output files (in .png format) can be found in the directory /glade/scratch/$USER/expt_dirs/test_CONUS_25km_GFSv15p2/2019061500/postprd.
The png files can be found using ls command after changing to that directory:
ls *.png
10mwind_conus_f012.png 2mt_conus_f006.png qpf_conus_f012.png slp_conus_f006.png
250wind_conus_f006.png 2mt_conus_f012.png refc_conus_f006.png slp_conus_f012.png
250wind_conus_f012.png 500_conus_f006.png refc_conus_f012.png uh25_conus_f006.png
2mdew_conus_f006.png 500_conus_f012.png sfcape_conus_f006.png uh25_conus_f012.png
The png file can be displayed by the command display:
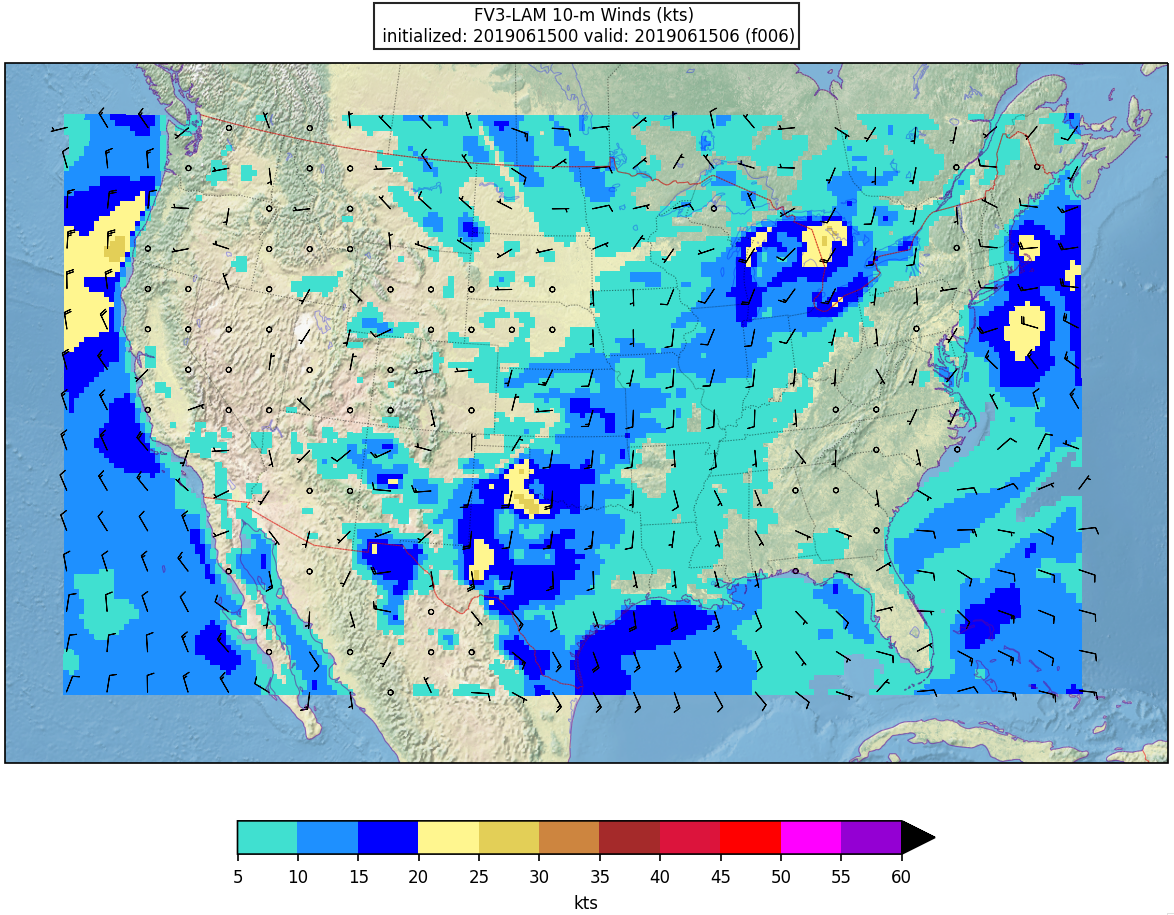
Here is an example plot of 10m surface wind at F006:
Running with batch script
(Estimated time: 25 min wall time for 48 forecast hours, every 3 hours)
There are some batch scripts under the same directory with the python scripts. If the batch script qsub_job.sh is being used to run the plotting script, multiple environment variables need to be set prior to submitting the script besides the python environment:
For bash:
export EXPTDIR=/glade/scratch/$USER/expt_dirs/test_CONUS_25km_GFSv15p2
For csh/tcsh:
setenv EXPTDIR /glade/scratch/$USER/expt_dirs/test_CONUS_25km_GFSv15p2
The HOMErrfs gives the location of regional workflow and EXPTDIR points to the experiment directory (test_CONUS_25km_GFSv15p2). In addition, the account to run the batch job in qsub_job.sh needs to be set. You might wish to change the FCST_INC in the batch script for different plotting frequency, and increase the walltime to 25 minutes (for 48 forecast hours, every 3 hours).
Then the batch job can be submitted by the following command:
qsub qsub_job.sh
The running log will be in the file $HOMErrfs/ush/Python/plot_allvars.out when the job completes.
The output files (in .png format) will be located in the same directory as the command line run: $EXPTDIR/2019061500/postprd