Session 2: Other Experiments
Session 2: Other ExperimentsNow that you've completed session 1, here are some other cases you can run. Each of these examples will use the same basic instructions from Session 1, and only the changes which need to be made are described here.
- Change grid resolution
- Run a different date and time
- Change the physics SDF (Suite Definition File)
- Use a different file format for initial conditions (nemsio, netcdf)
The following datasets have been staged for this training session on cheyenne. Please be sure to select a matching set of date/time/format when you run these cases.
| Date | nemsio | grib2 | netcdf |
|---|---|---|---|
| 20190615 00Z | x | x | |
| 20190711 06Z | x | x | |
| 20190829 00Z | x | x | |
| 20200202 00Z | x | x | x |
Note: the definition of a "case" in the Medium Range Weather App includes the grid resolution and physics suite. So, a change to either of these requires running the create_newcase step again. The date/time and file-format changes can be made in an existing case, so those two examples make changes to a case, and start from case.setup
0. Rebuild and rerun the base case (if needed)
0. Rebuild and rerun the base case (if needed)If necessary, follow steps 2-7 in Session 1 to rebuild and rerun the baseline case. This should only be necessary if files in the workflow have been deleted.
1. Run a different date
1. Run a different dateData is available for several different weather scenarios. Additional data may be downloaded and staged in your working directory, as described in the Users Guide.
First, to save any previous runs that you have completed, move that run directory to another location. Start from your case directory,
export RUNDIR=` ./xmlquery RUNDIR --value`
mv $RUNDIR $RUNDIR.2019082900
Then, set the new run date (and init time if needed), again from your case directory:
For a severe storm case:
For Hurricane Barry:
./xmlchange START_TOD=21600
And, submit the new run using
Follow Session 1, step 7 to visualize the output.
2. Change grid resolution
2. Change grid resolutionThere are 4 global resolutions supported by the UFS Medium Range Weather App. For this training session, please use only the C96 or C192, due to computational (and classtime) limits. The model resolution is specified with the “--res” option to the create_newcase command.
Starting at Step #3 from the Day 1 exercises, select a different resolution. You can query available grid resolutions by:
./query_config --grids
non-default grids are: atm:C96
alias: C192
non-default grids are: atm:C192
alias: C384
non-default grids are: atm:C384
alias: C768
non-default grids are: atm:C768
Select a C192 grid, and create the new case directory:
cd $UFS_SCRATCH/ufs-mrweather-app-workflow.c192
Then, continue with the instructions for Steps #4-7 from Day 1.
3. Change Physics SDF
3. Change Physics SDFPhysics parameterizations for the UFS Medium Range Weather App are selected with a Suite Definition File, used by the ufs-weather-model. This is configured as part of the “comp set” for a case. The physics suite is specified with the “--compset” option to the create_newcase command.
Starting at Step #3 from the Session 1 exercises, select a different physics suite. You can query available compsets by:
./query_config --compsets
--------------------------------------
Compset Alias: Compset Long Name
--------------------------------------
GFSv15p2 : FCST_ufsatm%v15p2_SLND_SICE_SOCN_SROF_SGLC_SWAV
GFSv16beta : FCST_ufsatm%v16beta_SLND_SICE_SOCN_SROF_SGLC_SWAV
HAFS : FCST_ufsatm%v0nocp_SLND_SICE_SOCN_SROF_SGLC_SWAV
The Medium Range Weather App supports the two listed GFS suites, so select the GFSv16beta for this experiment:
Change to the new case directory:
Then, continue with the instructions for Session 1: Steps #4-7.
4. Change IC file format
4. Change IC file formatChange input format from “grb2” to “nemsio” or “netCDF”
The MR Weather App requires numerous input files. The input files data format can be GRIB2, NEMSIO, or netCDF, and the input files must be staged by the user. More information can be found in the Users Guide at: https://ufs-mrweather-app.readthedocs.io/en/ufs-v1.1.0/inputs_outputs.html
The input file data format is set using namelist parameters.
Repeat (or re-use) the case you built yesterday.
Prior to Step #4, edit the file user_nl_ufsatm and add one of the following:
or
NOTE: NetCDF formatted input files are ONLY available for the 20200202 case, so be sure to set the run start date if you select the netcdf input option. Also, the netcdf input processing requires more memory, so adjust the processors-per-node as follows:
./xmlchange tasks_per_node=4 --subgroup case.chgres
And, submit the new run, using:
5. Run a restart case (beta)
5. Run a restart case (beta)In this exercise, you will set up and build the baseline case in a new directory, run it for 24 hours, then restart it and run for another 24 hours.
Start by creating a new case.
./create_newcase --case $UFS_SCRATCH/ufs-mrweather-app-workflow.c96_restart --compset GFSv15p2 --res C96 --workflow ufs-mrweather
Note that the directory in $UFS_SCRATCH has the _restart suffix.
Continue, analogous to steps 3-5 of Session 1.
./case.setup
./case.build
As before, it should take about 8 minutes to build the new case. Once done, change a few variables:
Set runtime to 24 hours
./xmlchange STOP_N=24
Reduce wallclock time from 12 hours to 30 minutes
Turn off short term archiving
For the Tutorial, there is a reserved queue:
Run the model for 24 hours
As before, you can use qstat to monitor your job's progress
If needed, you can kill your job:
When your initial job has completed, change CONTINUE_RUN to True
And the case will run for another 24 hours.
After it finishes, check your results with NCL:
wget https://raw.githubusercontent.com/wiki/ufs-community/ufs-mrweather-app/files/plot_ufs_sfcf.ncl
ncl plot_ufs_sfcf.ncl
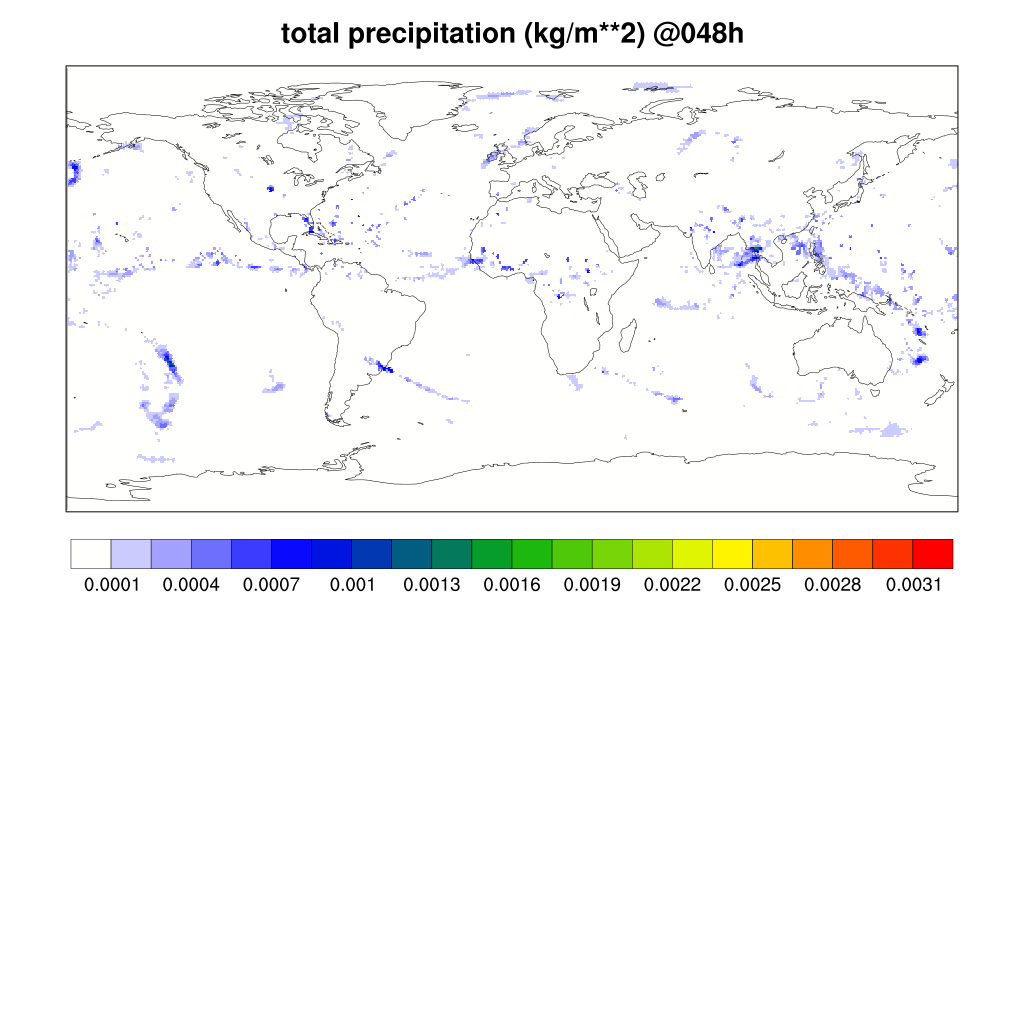
To visualize the resulting images in png, use the command:
display plot_ufs_phyf_tprcp.png
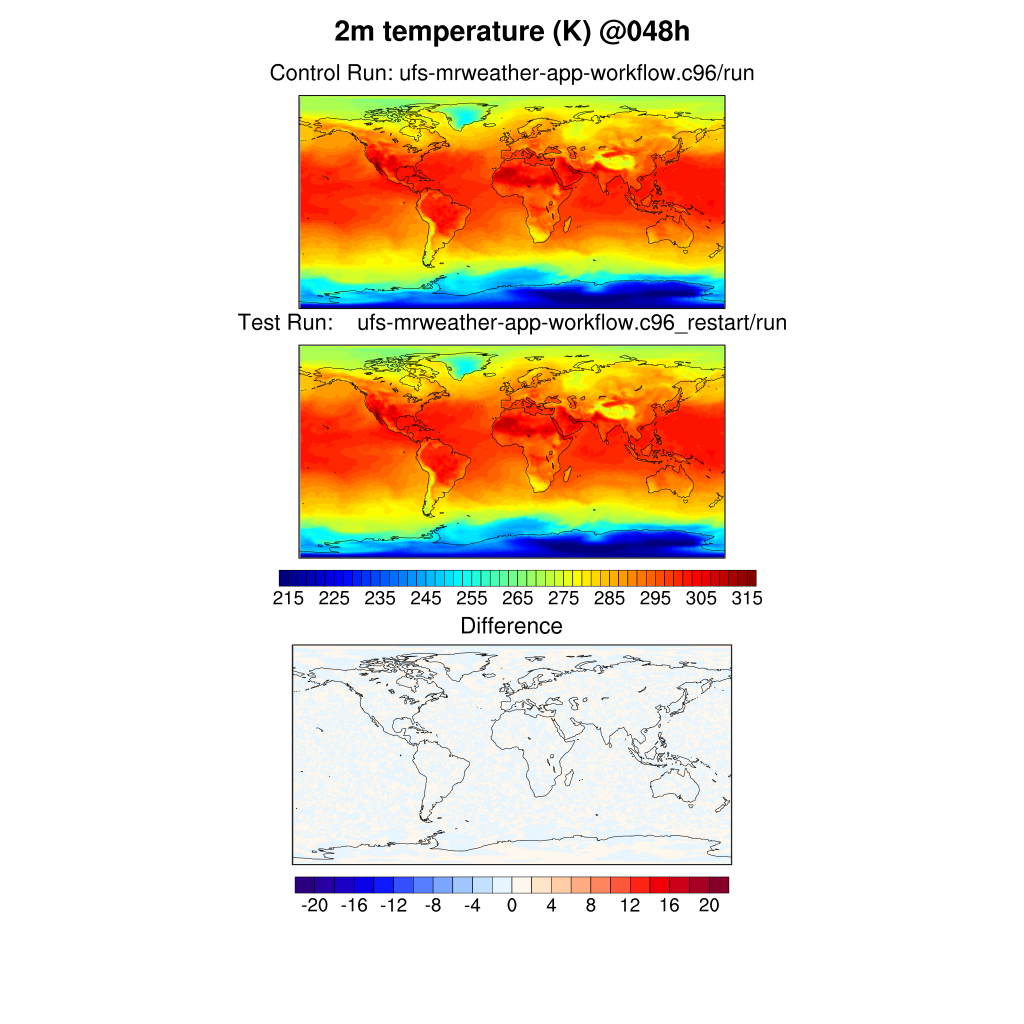
The sample plots are below. Click here to compare the restart run to the baseline run.

Compare restart run with baseline run
Compare restart run with baseline runTo generate a difference plot between the baseline and restart cases, download and run the NCL code
wget https://raw.githubusercontent.com/wiki/ufs-community/ufs-mrweather-app/files/plot_ufs_sfcf_diff.ncl
ncl plot_ufs_sfcf_diff.ncl 'c="ufs-mrweather-app-workflow.c96/run"' 't="ufs-mrweather-app-workflow.c96_restart/run"'
The difference plots for 2m air temperature are shown below: