UFS Medium-Range Weather (MRW) Practical Session Guide
UFS Medium-Range Weather (MRW) Practical Session GuideWelcome to the Unified Forecast System (UFS) Medium-Range Weather (MRW) Application Practical Session Guide
November 4-6, 2020
The MRW App practical session consists of three sessions with instructions focused on components described during the lecture series earlier in the day.
Session 1 uses a global C96 grid with the GFSv15.2 physics suite to run a 48 hour forecast using FV3GFS raw initial condition files. It then progresses to changing the concentration of cloud condensation nucleii (CCN) variables and compares the difference between the two runs.
Session 2 describes customizations that are commonly used, such as alternate physics suites, higher resolution grids, other use cases with alternate format initialization data, etc.
Session 3 explores customizing the post-processing configuration files to add or remove fields and levels in the Grib2 output.
Throughout this training, please note, blocks of text follow these conventions:
-
Black background with white text is the command you should run.
-
Gray background with black text is the output you should see when you run the command.
-
Blue background with black text is additional information
You will use the NCAR HPC computer, Cheyenne, to download, compile, and run the MRW App. Click on "Session 1" to get started.
Session 0: Transferring your files from cheyenne
Session 0: Transferring your files from cheyenneIf you want to save your files from cheyenne:
On your local machine (laptop/desktop), cd to a directory where you want to save your file. For example, on a Mac
where $USER is your localhost user name.
On cheyenne, cd to the directory where your files are located, e.g.:
ls *.png
plot_ufs_phyf_tprcp.png
Now, from your local machine, enter the following:
where $USER is now your cheyenne username and what follows the colon after cheyenne.ucar.edu is the absolute path to your files on cheyenne. Following that is a dot ('.') which represents your current directory on your local machine (you could also specify an absolute path to where you want to put the files.). You'll see:
Authenticate with your credentials. Next, the files will be downloaded:
plot_ufs_phyf_tprcp.png 100% 126KB 802.1KB/s 00:00
And the files should be in your local directory. On your local machine, enter:
plot_ufs_phyf_tprcp.png
For more information, see the scp man page:
Session 1: Set Up and Run the Model
Session 1: Set Up and Run the ModelThis session will enable you to build and run a simulation with initial conditions from August 29, 2019, during Hurricane Dorian. The simulation is configured for a C96 (~100km) resolution. The code base includes the UFS Weather Model, with pre- and post-processing, running in the Common Infrastructure for Modeling Earth (CIME) workflow. In order to perform the test, you will run the Medium-Range Weather Application for 48 hours.
In step 8, you will use the workflow software to make a change to the namelist that increases the concentration of cloud condensation nucleii (CCN), and perform another 48 hour run with this change. Then you will compare the total cloud cover field before and after the change.
0. Log in to Cheyenne
0. Log in to CheyenneLogin from a terminal (ssh -Y YourUserName@cheyenne.ucar.edu) following the instructions you received (Yubikey, Duo, other) to authenticate and complete the login.
* Welcome to Cheyenne - October 30, 2020
******************************************************************************
Today in the Daily Bulletin (dailyb.cisl.ucar.edu)
- NOAA postdoc fellowship program accepting application
- Summer internships program now accepting applications
- PBS job script documentation updated
Quick Start: www2.cisl.ucar.edu/resources/cheyenne/quick-start-cheyenne
User environment: www2.cisl.ucar.edu/resources/cheyenne/user-environment
Key module commands: module list, module avail, module spider, module help
CISL Help: support.ucar.edu -- 303-497-2400
--------------------------------------------------------------------------------
Go to your work space:
or
where $USER is your login/username, or
where ~ is shorthand for your home directory.
1. Clone the code
1. Clone the codeTo download the Medium-Range Weather Application, with externals pointing to its constituent components, go to your $HOME directory and enter:
git clone https://github.com/ufs-community/ufs-mrweather-app.git -b ufs-v1.1.0 $HOME/UFS_training/my_ufs_sandbox
Then, to get the components
./manage_externals/checkout_externals
This will clone the ufs-v1.1.0 branch of the ufs-mrweather-app repository and check out all of the externals and sub-modules. The process will take several minutes and show the following progress information in the screen:
Checking status of externals: model, fv3gfs_interface, cime, emc_post, nems_interface,
Checking out externals: model, fv3gfs_interface, emc_post, cime, nems_interface,
The repositories URL, tag number and their location path of external and sub-modules are defined in the text file Externals.cfg. Users can check this file and match the new cloned repositories with their local paths.
Once the externals have been been downloaded, you can proceed to the next step, setting up the environment.
2. Set up the environment
2. Set up the environmentPrior to building the model, the environment for CIME needs to be set up. This requires five environment variables:
UFS_SCRATCH: Writable directory where output for each case will go.
UFS_DRIVER: Default is nems, do not change.
CIME_MODEL: Default is ufs, do not change.
PROJECT: Account code on machine
Enter the following commands on Cheyenne. You may need to create a directory on /glade/scratch.
If you see something like
Then
mkdir $USER
This directory should persist throughout the tutorial.
For bash:
export UFS_SCRATCH=/glade/scratch/$USER/UFS_training
export UFS_DRIVER=nems
export CIME_MODEL=ufs
export PROJECT=NJNT0007
setenv UFS_SCRATCH /glade/scratch/$USER/UFS_training
setenv UFS_DRIVER nems
setenv CIME_MODEL ufs
setenv PROJECT NJNT0007
Note: You'll need to set the environments (export/setenv) each time you log in to do work with the MR-Weather-App. You can add these lines to your .bashrc/.cshrc file (found in your home directory) or put in a shell script that you can source each time you log in to cheyenne. Some exercises in this practical session involve loading different modules or versions of modules and/or editing namelists; you can use this page to reset back to the proper build/run environment for the baseline case.
3. Create a case
3. Create a caseA case is an instance of a MRW model simulation. It is determined by:
- component set
- model grid
- machine
- compiler
- any other additional customizations
Invoke create_newcase as follows from the cime/scripts directory using the following format:
./create_newcase --case $UFS_SCRATCH/ufs-mrweather-app-workflow.c96 --compset GFSv15p2 --res C96 --workflow ufs-mrweather
This will
- Create a case directory named /glade/scratch/$USER/UFS_training/ufs-mrweather-app workflow.c96
- Use the GFSv15p2 CCPP physics suite, C96 grid and the UFS weather model with pre and post-processing steps
The output can be seen here. When the case directory is created, the build is done.
Click here to move to step 4.
Create the case: screen output
Create the case: screen outputYou will see output such as the following:
Compset specification file is /glade/scratch/$USER/my_ufs_sandbox/src/model/FV3/cime/cime_config/config_compsets.xml
Automatically adding SESP to compset
Compset forcing is
ATM component is UFSATM Atmosphere with:CCPP physics version 15p2
LND component is Stub land component
ICE component is Stub ice component
OCN component is Stub ocn component
ROF component is Stub river component
GLC component is Stub glacier (land ice) component
WAV component is Stub wave component
ESP component is Stub external system processing (ESP) component
Pes specification file is /glade/scratch/$USER/my_ufs_sandbox/src/model/FV3/cime/cime_config/config_pes.xml
Compset specific settings: name is RUN_STARTDATE and value is 2019-08-29
Compset specific settings: name is START_TOD and value is 0
Compset specific settings: name is COMP_CLASSES and value is ATM
Compset specific settings: name is CHECK_TIMING and value is FALSE
Machine is cheyenne
Pes setting: grid match is a%C96
Pes setting: compset_match is ufsatm%v1
Pes setting: grid is a%C96_l%null_oi%null_r%null_g%null_w%null_z%null_m%null
Pes setting: compset is FCST_ufsatm%v15p2_SLND_SICE_SOCN_SROF_SGLC_SWAV_SESP
Pes setting: tasks is {'NTASKS_ATM': 108}
Pes setting: threads is {'NTHRDS_ATM': 1}
Pes setting: rootpe is {}
Pes setting: pstrid is {}
Pes other settings: {}
Pes comments: none
Compset is: FCST_ufsatm%v15p2_SLND_SICE_SOCN_SROF_SGLC_SWAV_SESP
Grid is: a%C96_l%null_oi%null_r%null_g%null_w%null_z%null_m%null
Components in compset are: ['ufsatm', 'slnd', 'sice', 'socn', 'srof', 'sglc', 'swav', 'sesp']
Using project from env PROJECT: P48503002
No charge_account info available, using value from PROJECT
ufs model version found: 1e9cdab
Batch_system_type is pbs
job is case.chgres USER_REQUESTED_WALLTIME None USER_REQUESTED_QUEUE None WALLTIME_FORMAT %H:%M:%S
job is case.run USER_REQUESTED_WALLTIME None USER_REQUESTED_QUEUE None WALLTIME_FORMAT %H:%M:%S
job is case.gfs_post USER_REQUESTED_WALLTIME None USER_REQUESTED_QUEUE None WALLTIME_FORMAT %H:%M:%S
job is case.st_archive USER_REQUESTED_WALLTIME None USER_REQUESTED_QUEUE None WALLTIME_FORMAT %H:%M:%S
Creating Case directory /glade/scratch/$USER/ufs-mrweather-app-workflow.c96
When the case directory is created, the build is done.
4. Set up the case run script
4. Set up the case run scriptMove to this case directory to set up and build the model:
This step creates the scripts needed to build and run the model along with the namelist:
Note the new bld and run directories under your case directory:
- /glade/scratch/$USER/ufs-mrweather-app-workflow.c96/bld
- /glade/scratch/$USER/ufs-mrweather-app-workflow.c96/run
The bld directory will contain the executables ufs.exe, ncep_post and chgres_cube.exe when ./case.build is executed (next step). The run directory will be populated when the case is run. Note that chgres_cube.exe and ncep_post are links to the NCEPLIBS-ufs-v1.1.0 directory, since they are built with the NCEPLIBS.
You can see more details of the case setup by running:
./preview_namelists
5. Build the model executable
5. Build the model executableThis step builds ufs.exe in about 8 minutes:
The last part of the output looks like:
Building atm with output to /glade/scratch/$USER/ufs-mrweather-app workflow.c96/bld/atm.bldlog.200930-094156
ufsatm built in 484.297560 seconds
Building ufs from
/glade/p/ral/jntp/$USER/my_ufs_sandbox/cime/../src/model/NEMS/cime/cime_config/bui ldexe with output to /glade/scratch/$USER/ufs-mrweather-app
workflow.c96/bld/ufs.bldlog.200930-094156
Time spent not building: 6.931199 sec
Time spent building: 485.038825 sec
MODEL BUILD HAS FINISHED SUCCESSFULLY
Once the build has finished successfully, check bld and run to see the results of the build process.
6. Run the case
6. Run the caseModify the runtime settings in env_run.xml for a low-resolution, 48 hour forecast:
- Reduce run length from 5 days to 48 hours
- Reduce wallclock time from 12 hours to 30 minutes
- Turn off short term archiving
- For the Tutorial, there is a reserved queue:
Run the case:
See https://ufs-mrweather-app.readthedocs.io/en/ufs-v1.1.0/quickstart.html for more information on this command.
After running ./case.submit, you will see:
Submitted job id is 4433245.chadmin1.ib0.cheyenne.ucar.edu Submitted job case.chgres with id
4433243.chadmin1.ib0.cheyenne.ucar.edu
Submitted job case.run with id 4433244.chadmin1.ib0.cheyenne.ucar.edu Submitted job case.gfs_post with id
4433245.chadmin1.ib0.cheyenne.ucar.edu
Monitor your job's progress in the queue:
If needed, you can kill your job:
How to tell if your job is completed:
tail run/chgres_cube.yymmdd-hhmmss.log: DONE.
tail run/ufs.log.<jobid>.yymmdd-hhmmss: PROGRAM nems HAS ENDED.
tail run/oi.hhh: PROGRAM UNIFIED_POST HAS ENDED.
7. Check your results
7. Check your resultsYour outputs will be in the $UFS_SCRATCH/ufs-mrweather-app-workflow.c96/run directory. After a successful run, the directory will look like this:
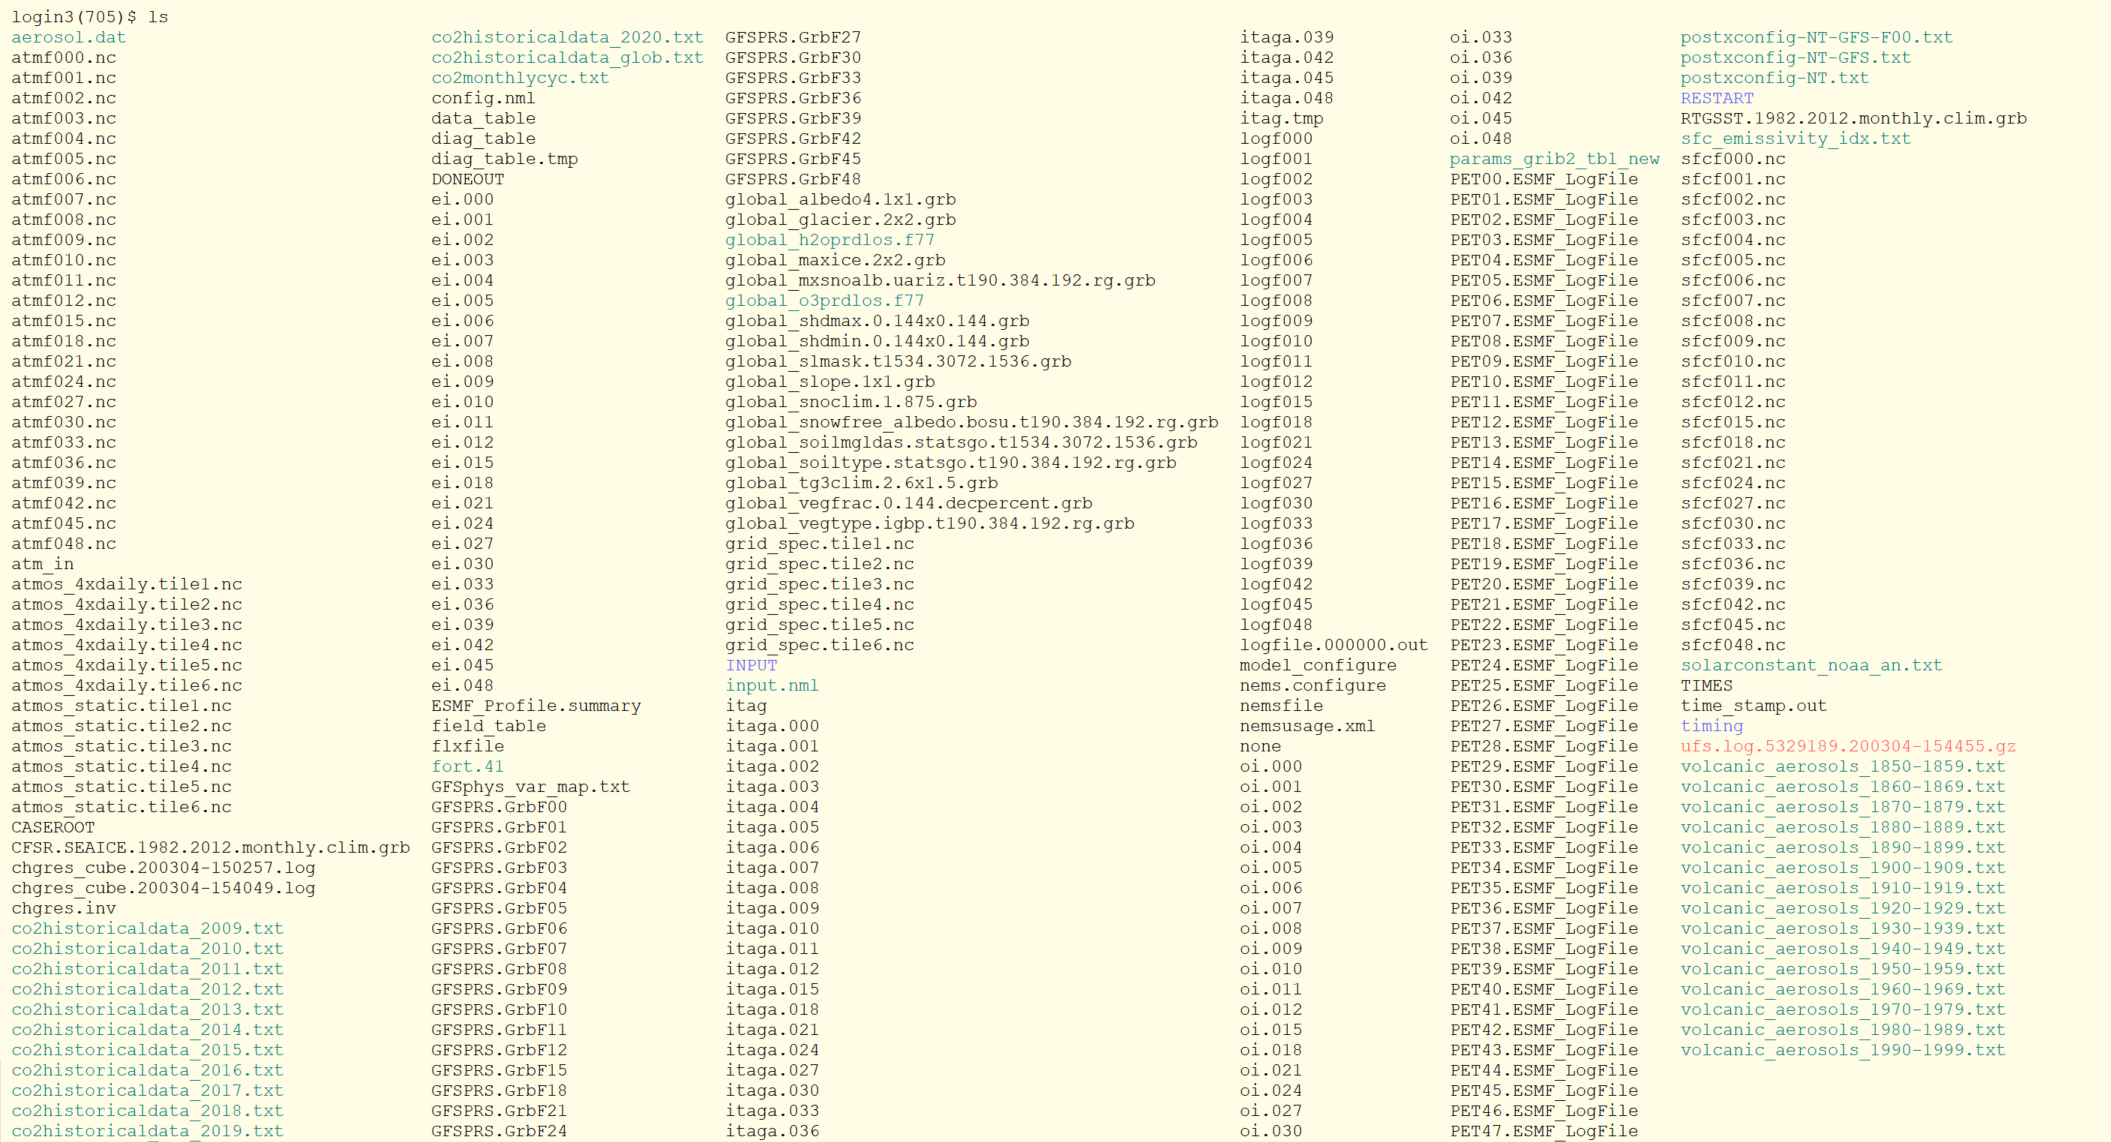
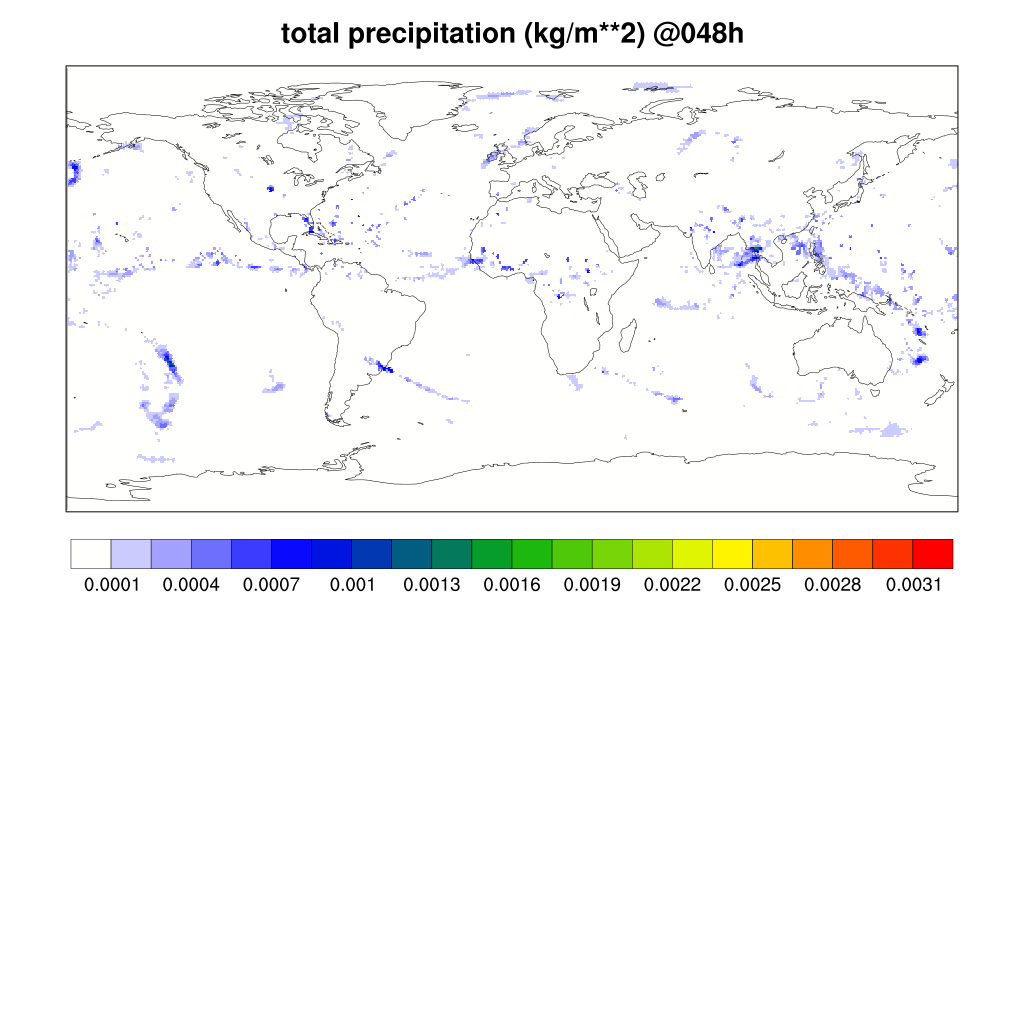
For visually checking the results of your run, we have provided a NCL script that plots 2-m temperature (tmp2m) and total precipitation (tprcp) at 48 h.
You will need to load NCL first:
Then get and run the script:
wget https://raw.githubusercontent.com/wiki/ufs-community/ufs-mrweather-app/files/plot_ufs_sfcf.ncl
ncl plot_ufs_sfcf.ncl
To visualize the resulting images in png, use the command:
display plot_ufs_phyf_tprcp.png
The sample plots are below.


Now that you completed this step, the next step is to change a namelist option and run a second test to check your understanding of how results will change.
8. Build a new case and change some variables
8. Build a new case and change some variablesYou will need to create a new case directory for this experiment (we will use ufs-mrweather-app-workflow.c96_exp - note the "_exp" this time), and setup the new case.
./create_newcase --case $UFS_SCRATCH/ufs-mrweather-app-workflow.c96_exp --compset GFSv15p2 --res C96 --workflow ufs-mrweather
cd $UFS_SCRATCH/ufs-mrweather-app-workflow.c96_exp
./case.setup
At this point, you can see the current values for CCN (ccn_o = 100 and ccn_l = 300) by looking at the input.nml file in the control run:
You will set the values through the workflow:
Use your editor to append the following to the entries at the bottom of the file user_nl_ufsatm
ccn_o = 300.
Next you will build the case:
Once that completes, change the run duration to 48 hours and reduce the time request. Then submit the case.
./xmlchange JOB_WALLCLOCK_TIME=00:45:00
./xmlchange --force JOB_QUEUE=S4857724
./case.submit
Once again, you can monitor your jobs in the queue:
And if needed, you can kill your job:
As before, you should see the output files in the case run directory for the experiment:
tail run/chgres_cube.yymmdd-hhmmss.log: DONE.
tail run/ufs.log.<jobid>.yymmdd-hhmmss: PROGRAM nems HAS ENDED.
tail run/oi.hhh: PROGRAM UNIFIED_POST HAS ENDED.
9. Compare outputs
9. Compare outputsChanging the concentration of CCN creates a noticeable difference in the total cloud cover. Now that you've completed both runs compare the total cloud cover before and after the CCN change.
We are providing a script that plots the differences between control and test runs for 2m temperature (tmp2m), total precipitation (tprcp), and atmospheric column total cloud cover (tcdc_aveclm) at 48h.
To get and run this NCL script execute the following commands. This script will produce png files for each variable being plotted. The argument "c=" is the control run directory, and "t=" is the test run directory.
wget https://raw.githubusercontent.com/wiki/ufs-community/ufs-mrweather-app/files/plot_ufs_sfcf_diff.ncl
ncl plot_ufs_sfcf_diff.ncl 'c="ufs-mrweather-app-workflow.c96/run"' 't="ufs-mrweather-app-workflow.c96_exp/run"'
View the total cloud cover:
Your NCL output of atmospheric column total cloud cover difference should look like this:

You can also look at the 2-meter temperature and precipitation:
display plot_ufs_phyf_diff_tprcp.png
Congratulations! You've completed Session 1.
Session 2: Other Experiments
Session 2: Other ExperimentsNow that you've completed session 1, here are some other cases you can run. Each of these examples will use the same basic instructions from Session 1, and only the changes which need to be made are described here.
- Change grid resolution
- Run a different date and time
- Change the physics SDF (Suite Definition File)
- Use a different file format for initial conditions (nemsio, netcdf)
The following datasets have been staged for this training session on cheyenne. Please be sure to select a matching set of date/time/format when you run these cases.
| Date | nemsio | grib2 | netcdf |
|---|---|---|---|
| 20190615 00Z | x | x | |
| 20190711 06Z | x | x | |
| 20190829 00Z | x | x | |
| 20200202 00Z | x | x | x |
Note: the definition of a "case" in the Medium Range Weather App includes the grid resolution and physics suite. So, a change to either of these requires running the create_newcase step again. The date/time and file-format changes can be made in an existing case, so those two examples make changes to a case, and start from case.setup
0. Rebuild and rerun the base case (if needed)
0. Rebuild and rerun the base case (if needed)If necessary, follow steps 2-7 in Session 1 to rebuild and rerun the baseline case. This should only be necessary if files in the workflow have been deleted.
1. Run a different date
1. Run a different dateData is available for several different weather scenarios. Additional data may be downloaded and staged in your working directory, as described in the Users Guide.
First, to save any previous runs that you have completed, move that run directory to another location. Start from your case directory,
export RUNDIR=` ./xmlquery RUNDIR --value`
mv $RUNDIR $RUNDIR.2019082900
Then, set the new run date (and init time if needed), again from your case directory:
For a severe storm case:
For Hurricane Barry:
./xmlchange START_TOD=21600
And, submit the new run using
Follow Session 1, step 7 to visualize the output.
2. Change grid resolution
2. Change grid resolutionThere are 4 global resolutions supported by the UFS Medium Range Weather App. For this training session, please use only the C96 or C192, due to computational (and classtime) limits. The model resolution is specified with the “--res” option to the create_newcase command.
Starting at Step #3 from the Day 1 exercises, select a different resolution. You can query available grid resolutions by:
./query_config --grids
non-default grids are: atm:C96
alias: C192
non-default grids are: atm:C192
alias: C384
non-default grids are: atm:C384
alias: C768
non-default grids are: atm:C768
Select a C192 grid, and create the new case directory:
cd $UFS_SCRATCH/ufs-mrweather-app-workflow.c192
Then, continue with the instructions for Steps #4-7 from Day 1.
3. Change Physics SDF
3. Change Physics SDFPhysics parameterizations for the UFS Medium Range Weather App are selected with a Suite Definition File, used by the ufs-weather-model. This is configured as part of the “comp set” for a case. The physics suite is specified with the “--compset” option to the create_newcase command.
Starting at Step #3 from the Session 1 exercises, select a different physics suite. You can query available compsets by:
./query_config --compsets
--------------------------------------
Compset Alias: Compset Long Name
--------------------------------------
GFSv15p2 : FCST_ufsatm%v15p2_SLND_SICE_SOCN_SROF_SGLC_SWAV
GFSv16beta : FCST_ufsatm%v16beta_SLND_SICE_SOCN_SROF_SGLC_SWAV
HAFS : FCST_ufsatm%v0nocp_SLND_SICE_SOCN_SROF_SGLC_SWAV
The Medium Range Weather App supports the two listed GFS suites, so select the GFSv16beta for this experiment:
Change to the new case directory:
Then, continue with the instructions for Session 1: Steps #4-7.
4. Change IC file format
4. Change IC file formatChange input format from “grb2” to “nemsio” or “netCDF”
The MR Weather App requires numerous input files. The input files data format can be GRIB2, NEMSIO, or netCDF, and the input files must be staged by the user. More information can be found in the Users Guide at: https://ufs-mrweather-app.readthedocs.io/en/ufs-v1.1.0/inputs_outputs.html
The input file data format is set using namelist parameters.
Repeat (or re-use) the case you built yesterday.
Prior to Step #4, edit the file user_nl_ufsatm and add one of the following:
or
NOTE: NetCDF formatted input files are ONLY available for the 20200202 case, so be sure to set the run start date if you select the netcdf input option. Also, the netcdf input processing requires more memory, so adjust the processors-per-node as follows:
./xmlchange tasks_per_node=4 --subgroup case.chgres
And, submit the new run, using:
5. Run a restart case (beta)
5. Run a restart case (beta)In this exercise, you will set up and build the baseline case in a new directory, run it for 24 hours, then restart it and run for another 24 hours.
Start by creating a new case.
./create_newcase --case $UFS_SCRATCH/ufs-mrweather-app-workflow.c96_restart --compset GFSv15p2 --res C96 --workflow ufs-mrweather
Note that the directory in $UFS_SCRATCH has the _restart suffix.
Continue, analogous to steps 3-5 of Session 1.
./case.setup
./case.build
As before, it should take about 8 minutes to build the new case. Once done, change a few variables:
Set runtime to 24 hours
./xmlchange STOP_N=24
Reduce wallclock time from 12 hours to 30 minutes
Turn off short term archiving
For the Tutorial, there is a reserved queue:
Run the model for 24 hours
As before, you can use qstat to monitor your job's progress
If needed, you can kill your job:
When your initial job has completed, change CONTINUE_RUN to True
And the case will run for another 24 hours.
After it finishes, check your results with NCL:
wget https://raw.githubusercontent.com/wiki/ufs-community/ufs-mrweather-app/files/plot_ufs_sfcf.ncl
ncl plot_ufs_sfcf.ncl
To visualize the resulting images in png, use the command:
display plot_ufs_phyf_tprcp.png
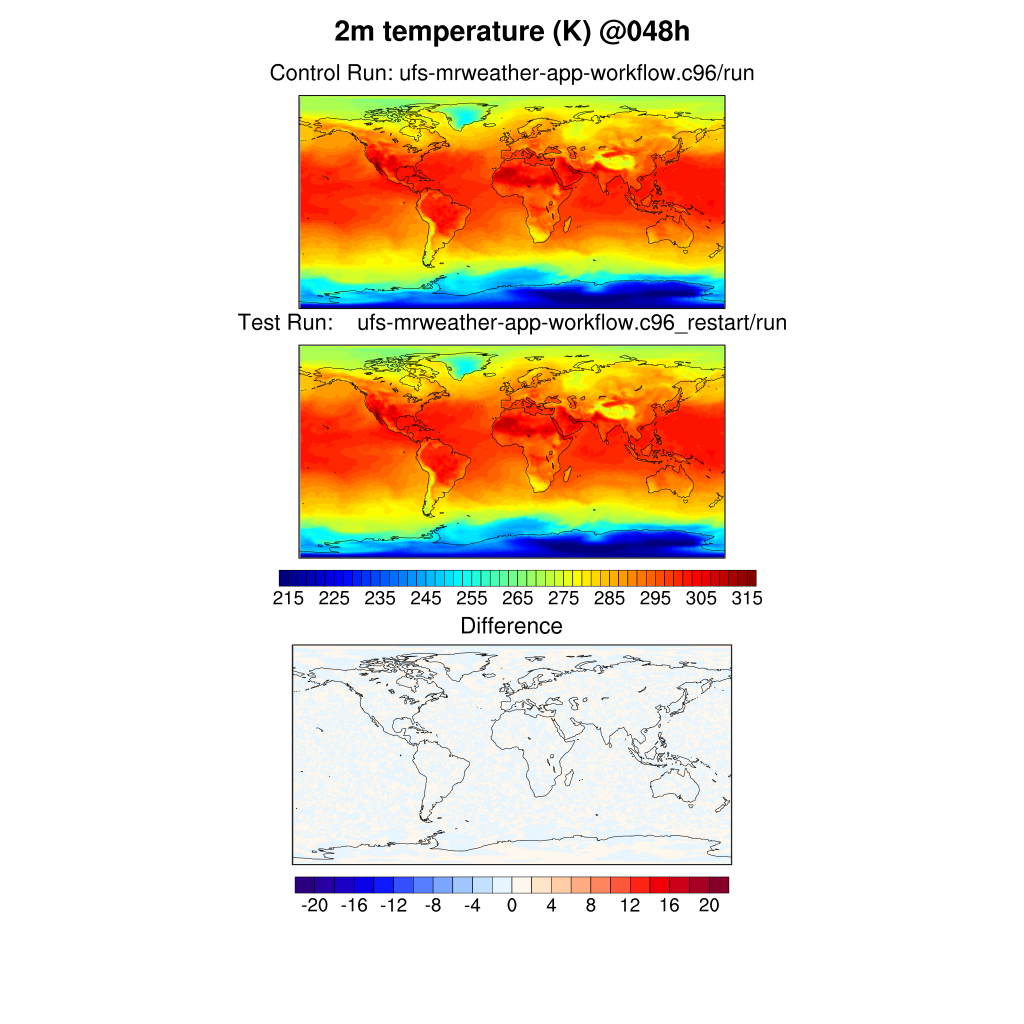
The sample plots are below. Click here to compare the restart run to the baseline run.

Compare restart run with baseline run
Compare restart run with baseline runTo generate a difference plot between the baseline and restart cases, download and run the NCL code
wget https://raw.githubusercontent.com/wiki/ufs-community/ufs-mrweather-app/files/plot_ufs_sfcf_diff.ncl
ncl plot_ufs_sfcf_diff.ncl 'c="ufs-mrweather-app-workflow.c96/run"' 't="ufs-mrweather-app-workflow.c96_restart/run"'
The difference plots for 2m air temperature are shown below:
Session 3: Post-processing.
Session 3: Post-processing.The following set of instructions will guide you through how to customize the UPP configuration files to add/remove fields/levels in the Grib2 output for MRW v1.1.0. This requires a pre-processing step to create the flat text configuration file that UPP reads. In order to ensure there are no errors in your modified *.xml files, you may validate them against the XML stylesheets provided in the directory.
0. Rebuild and rerun the base case (if needed)
0. Rebuild and rerun the base case (if needed)Exercises in session 2 may have changed variables or output. To reset, follow steps 2-7 in Session 1 to rebuild and rerun the baseline case. This is usually not needed, but added her for completeness.
1. Prepare the files
1. Prepare the filesSetup the environment for the case directory location.
For bash:
For csh:
Load the wgrib2 module on Cheyenne.
Move to the directory that contains the configuration files and scripts used for creating a custom flat text file read by UPP.
We recommend creating copies of the original *.xml and *.txt files that will be modified or created by this process so they are not overwritten.
cp postcntrl_gfs_f00.xml postcntrl_gfs_f00.xml.orig
cp postxconfig-NT-GFS.txt postxconfig-NT-GFS.txt.orig
cp postxconfig-NT-GFS-F00.txt postxconfig-NT-GFS-F00.txt.orig
2. Example: Adding a field
2. Example: Adding a fieldThis example describes how to add the field SFEXC (heat exchange coefficient at the surface) to the postcntrl_gfs.xml and postcntrl_gfs_f00.xml configuration files. Using your favorite text editor, edit each configuration file by adding the following parameter to the list at the end of the file, but before the </paramset> and </postxml> tags.
<shortname>SFEXC_ON_SURFACE</shortname>
<scale>3.0</scale>
</param>
You may also delete an unwanted field by completely removing the parameter block of that field from these files and then continuing with step 5.
* Formatting is important; use other entries in the file as a guide.
** Adding fields requires knowledge on which fields can be output for your specific dynamic core and physics options. Not all fields available in UPP can be output with the UFS MRW application.
3. Example: Adding levels to a field
3. Example: Adding levels to a fieldThis example will describe how to add height agl levels to the SPFH field in the postcntrl_gfs.xml and postcntrl_gfs_f00.xml configuration files. Using your favorite text editor, edit each configuration file by adding the bold highlighted levels to the field ‘Specific humidity on flight levels’.
<shortname>SPFH_ON_SPEC_HGT_LVL_ABOVE_GRND_FDHGT</shortname>
<level>20. 30. 40. 50. 80. 100.</level>
<scale>4.0</scale>
</param>
Leave no whitespace between the opening <level> and 20. and between 100. and the closing </level>
For the list of available levels for each level type, please reference the UPP documentation on ‘Controlling which levels UPP outputs’.
You may also easily remove levels from the <level> tag by simply deleting them from the list.
* Formatting is important; use other entries in the file as a guide.
4. Validate the XML files
4. Validate the XML filesIn order to ensure there are no errors in your modified *.xml files, you may validate them against the XML stylesheets provided in the directory:
xmllint --noout --schema EMC_POST_CTRL_Schema.xsd postcntrl_gfs_f00.xml
If the xml’s are error free, then the commands will return that the xml validates. (e.g. postcntrl_gfs.xml validates)
5. make and run the files
5. make and run the filesIn the $HOME/UFS_training/my_ufs_sandbox/src/post/parm directory, create the flat text files.
Running make calls the perl program PostXMLPreprocessor.pl, which checks for any modified xml files and re-creates the flat text configuration files where changes were found. The new files generated for this example include:
postxconfig-NT-GFS-F00.txt
In order to run the MRW post-processing with these new customized flat text files, you will need to copy or link them to the following location from the top level of your case directory.
cp postxconfig-NT-GFS-F00.txt $CASEROOT/SourceMods/src.ufsatm/
Check that the workflow recognizes the flat text files in the new directory location by previewing the namelist before re-running UPP.
./preview_namelists
Using $UFS_SCRATCH/ufs-mrweather-app-workflow.c96/SourceMods/src.ufsatm/postxconfig-NT-GFS-F00.txt for post-processing
When running the workflow, CIME first looks in the ${CASEROOT}/SourceMods/src.ufsatm directory for the UPP parameter file(s) and uses them for the post-processing. If there are no flat text files present in this directory, then the default parameter file(s) in the pre-configured location are used.
UPP output from the initial case run (Session 1) is located in $CASEROOT/run with the naming convention:
If you would like to keep the previous UPP output to compare, copy it to a new name or directory so it does not get overwritten.
Rerun the UPP job to output the new field and/or levels.
./case.submit --only-job case.gfs_post
You can check the new UPP output using a simple wgrib2 command. For example, to check that the new SPFH height levels were added:
773:38125949:d=2019082900:SPFH:20 m above ground:12 hour fcst:
776:38348160:d=2019082900:SPFH:30 m above ground:12 hour fcst:
779:38573297:d=2019082900:SPFH:40 m above ground:12 hour fcst:
782:38800697:d=2019082900:SPFH:50 m above ground:12 hour fcst:
786:39055090:d=2019082900:SPFH:80 m above ground:12 hour fcst:
791:39396135:d=2019082900:SPFH:100 m above ground:12 hour fcst:
...
You can also view additional diagnostic output such as min/max values. For example, to just look at the newly added variable SFEXC:
ndata=73728:undef=0:mean=0.0138409:min=0:max=0.189
grid_template=40:winds(N/S):
Gaussian grid: (384 x 192) units 1e-06 input WE:NS output WE:SN
number of latitudes between pole-equator=96 #points=73728
lat 89.284225 to -89.284225
lon 0.000000 to 359.062500 by 0.937500
If UPP fails, the UPP log files, $CASEROOT/run/oi.HHH, can be consulted for errors.
6. Optional: regrid UPP using wgrib2
6. Optional: regrid UPP using wgrib2UPP grib2 output is on the same grid as the model output, which for the MRW is a Guassian grid. The specifications for a simple lat-lon projection are:
-new_grid latlon lon0:nlon:dlon lat0:nlat:dlat
| Variable | Description |
| lon0/lat0 | Longitude/Latitude of first grid point in degrees |
| nlon/nlat | Number of Longitudes/Latitudes |
| dlon/dlat | Grid resolution in degrees of Longitude/Latitude |
Move to the run directory and run the following example.
wgrib2 GFSPRS.GrbF12 -new_grid_winds earth -new_grid latlon 0:1440:0.25 90:721:-0.25 GFSPRS.GrbF12.latlon
This would interpolate to a 0.25 degree latitude-longitude grid with earth-relative winds (U-wind goes east, V-wind goes north).
You can check the new grid by again using wgrib2. We will print out the info just for the SFEXC field rather than list all fields.
ndata=1038240:undef=0:mean=0.013828:min=0:max=0.187
grid_template=0:winds(N/S):
lat-lon grid:(1440 x 721) units 1e-06 input WE:NS output WE:SN res 48
lat 90.000000 to -90.000000 by 0.250000
lon 0.000000 to 359.750000 by 0.250000 #points=1038240
For more examples, you can refer to the wgrib2 site.